
Whether it’s for your business or your family, the holidays are a great time to send an update to friends, family, and colleagues. Here at MagCloud we think the best way to do that is with a beautifully designed print piece, so we’ve created a few holiday newsletter templates to help you get started. Once you’ve personalized your template of choice by adding your own photos and text in Adobe InDesign, Apple Pages, or Microsoft Word, follow our instructions to export a MagCloud-ready PDF file and then upload it to the MagCloud website to place your print order. We can even help you ship a copy of your newsletter to everyone on your address list with our Ship to Group feature. You can also opt to make your newsletter available as a digital version to share virtually if you don’t have someone’s shipping address.
Click the links below to download one of these new templates, or visit the MagCloud website to find more downloadable templates. Just be sure to check out our holiday shipping schedule to make sure you place your order in time. If you are using one of the templates below, you will also need to download the following free fonts:
Bebas Neue Regular
Langdon
Ostrich Sans
Linden Hill
Marcelle Script
Nexa Light
note: all templates will download as .zip files and will need to be unzipped before they can be opened in Adobe InDesign, Microsoft Word or Apple Pages
Holiday Newsletter for Your Business
 Send your customers an overview of what you did in 2013 and let them know what they can look forward to in 2014 with our holiday business newsletter template. This two-page template was designed for MagCloud’s 8.25″ x 10.75″ Flyer, a double-sided single-sheet product with optional UV coating, and you’ll be able to print this newsletter for as little as $0.30 per piece when you purchase 20 or more copies. When you download this template you’ll be able to choose from three layout options: no logo, a rectangular logo, or a circular/square logo. When you are ready to export your file, be sure to follow the PDF export instructions in our Software Specific Instruction Package for your software of choice, available to download on our PDF Design Resources page.
Download this template for Adobe InDesign (CS5 and newer): No Logo | Rectangle Logo | Square or Circle Logo
Download this template for Apple Pages: No Logo | Rectangle Logo | Square or Circle Logo
Download this template for Microsoft Word: No Logo | Rectangle Logo | Square or Circle Logo
Holiday Flyer Newsletter for Your Family
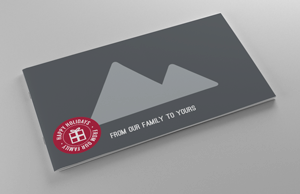
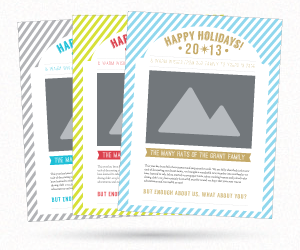 Let your family and friends know what you’ve been up to the past year with our holiday flyer newsletter template. This short and sweet two-page template is available in three color combinations and was designed for MagCloud’s 8.25″ x 10.75″ Flyer, a double-sided single-sheet product with optional UV coating, and you’ll be able to print this newsletter for as little as $0.30 per piece when you purchase 20 or more copies. After you’ve personalized the template with your family’s photos and text content, export your MagCloud-ready PDF using the instructions in our Software Specific Instruction Package for your software of choice, available to download on our PDF Design Resources page.
Download this template for Adobe InDesign (CS5 and newer): Silver | Red | Gold
Download this template for Apple Pages: Silver | Red | Gold
Download this template for Microsoft Word: Silver | Red | Gold
Holiday Pamphlet Newsletters for Your Family
 If you’re looking for a little more space in your holiday newsletter, check out our pamphlet templates. These four-page templates were designed for MagCloud’s 8.25″ x 10.75″ and 8″ x 8″ Pamphlet products, which have a half-fold binding and can be printed for as little as $0.60 per piece when you purchase 20 or more copies. The 8″ x 8″ version is available in the same three color combinations as the Flyer template. After you’ve personalized the template with your family’s photos and text content, export your MagCloud-ready PDF using the instructions in our Software Specific Instruction Package for your software of choice, available to download on our PDF Design Resources page. Be sure to select your chosen pamphlet size from the top of the page (8″ x 8″ or 8.25″ x 10.75″) before downloading the Instruction Package.
Click here to download the 8.25″ x 10.75″ Pamphlet template for Adobe InDesign (CS5 and newer)
Download the 8″ x 8″ Pamphlet template for Adobe InDesign (CS5 and newer): Silver | Red | Gold
Click here to download the 8.25″ x 10.75″ Pamphlet template for Apple Pages
Download the 8″ x 8″ Pamphlet template for Apple Pages: Silver | Red | Gold
Click here to download the 8.25″ x 10.75″ Pamphlet template for Microsoft Word
Download the 8″ x 8″ Pamphlet template for Microsoft Word: Silver | Red | Gold
Holiday Photobook Newsletter for Your Family
 If you want to send even more photos to your family and friends this holiday season, we’ve created a longer photobook newsletter template. This template was designed for MagCloud’s 8.25″ x 5.25″ Digest product, and includes 16 pages to place your photo and text content. If you want to fill up all 16 pages, a print copy of this photobook will cost you just $2.56. You can also choose to delete pages in the template for a shorter 12 or 8 page booklet, or duplicate pages to make an even longer photobook and take advantage of our perfect binding option. When you are ready to export your file, be sure to follow the PDF export instructions in our Software Specific Instruction Package for your software of choice, available to download on our PDF Design Resources page.
Click here to download this template for Adobe InDesign (CS5 and newer)
 The mid-year timing of Father’s Day is a perfect opportunity to create a custom photo calendar that your dad can enjoy through the end of 2014. We’ve modified our
 Before you and your friends head off in various directions after graduation, commemorate the fun times you had together in a photobook. MagCloud’s 8.25″ x 5.25″ Digest product is a great size for displaying full color photographs in a nice compact format, and only costs $0.16 per page to print. Check out our blog posts about creating photobooks with
  Now that you’ve received all those generous graduation gifts, show your appreciation with customized thank you notes. MagCloud’s single sheet Flyers in our smaller Digest size are printed on a heavier cover stock that make them ideal for using as flat notecards, and the size fits perfectly into
  For those of you heading into the work world as artists, photographers, designers, architects, or writers, MagCloud is a


 For an 8″ x 8″ MagCloud publication, select your Book Settings to match those shown to the right. Specifically:
 For a 12″ x 12″ MagCloud publication, select your settings to match those shown to the right. Specifically:
 One option for adding pages is to choose a Preset under the Auto Layout section, and click the Auto Layout button. This will automatically add pages to your book and layout all the photos from the collection you have selected based on the Preset you specified. This is a great way to get a book laid out very quickly, but all of your page layouts will be the same. If you want to change any of your page layouts after using the Auto Layout function, you can always do so by selecting the page and choosing a different layout from the Page section.
 When you have finished laying out your content, click the Export Book to PDF button in the bottom right-hand corner of your screen. Select a name for your PDF, and choose where you want it to be saved on your computer. After you click the Save button, you can track the progress of your PDF in the upper left-hand corner of the screen. Lightroom will export two PDFs: one that is a single page and has “Cover” added to the filename and another that is a multi-page PDF. For creating a MagCloud publication, you can disregard the cover PDF, and just upload the multi-page PDF to the
  When selecting your layouts and choosing images, it’s good to keep in mind how your PDF will be trimmed by MagCloud. The Lightroom layouts all have a pretty good margin around them, so there shouldn’t be an issue with keeping content inside the MagCloud-recommended safe zone.
